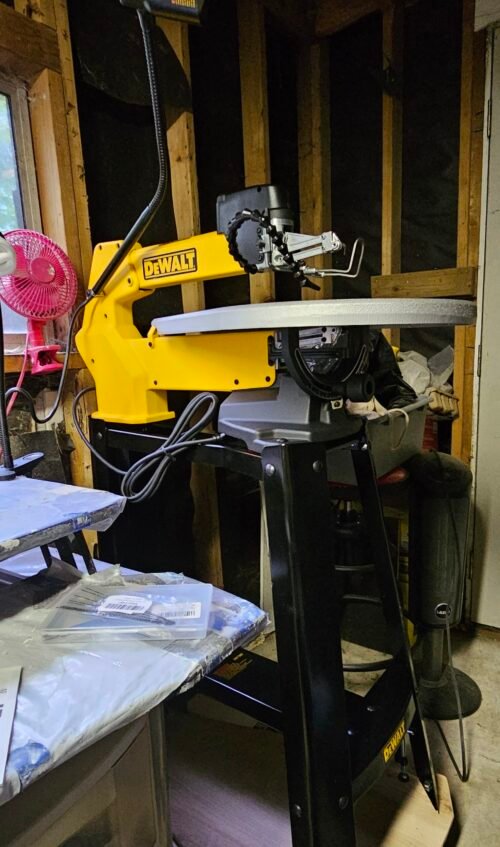
SO…. I did a thing. I bought myself a Christmas present and I finally finished putting it together. It ONLY took 4 or 5 runs to Lowes and Home Depot. LOL
I bought a Dewalt 21 inch scroll saw. Oh my goodness but I love power tools!

I bought it with the stand and a light, though the light is very dim. So I ordered some LED lightbulbs that will be here next week. Though new shop lights would help the best! The stand assembly took me the longest. I knew that the machine was going to be heavy so I made a rolling stand. It raises it up pretty high but it is a perfect height for me to stand and work and I have a high shop stool that I could sit at. But since I sit all day for work then standing is good for me.
I bought a furniture mover from Harbor Freight. It was on sale and I also got another discount so it was less than $15. Then I got a piece of 1/2in plywood. (I cannot believe the price of wood!) After the stand was put together I drew out a pattern for the base and then cut it out of the plywood. I sanded it all nice and smooth. It did have a boo boo where my mind went “Bird” so I made and extra cut. Oops. It is in front of one of the legs.

Then I bolted the stand to the plywood and this is what caused all the trips to the home improvement store. The holes in the stand for the base are 1/2in. I bought a 1/2 in drill bit and the galvanized 1/2 bolts. The bolts were just slightly too big for the holes. SO back to the store I go. I check the stainless steel 1/2in bolts and they seemed a tad smaller. I bought them, tried them and they wouldn’t fit in the stupid holes either. So back to the store I go. This time I got the smaller size down stainless steel bolts, nuts and extra washers. I ended up putting a washer on each side and it worked great. Then I just used clamps to attach the plywood base to the furniture mover. That is so I can move the heavy machine by myself easily. Hopefully some day I will live where I can have it on the floor. But right now I have to be careful what I put on the floor because our shed has a tendency to leak from beneath the walls when it rains alot.
Yesterday I got the machine on the stand and all the screws screwed in. Some of them were very hard to do. Horrible angles and Essential Tremor makes it really difficult to put on washers and nuts.
Today I went out there and figured out the blades and played around with some scrap plywood before moving to my hard insulation board. THEN,,, I tried the spiral blades!! GAME CHANGER!!! With the regular blades on the scroll saw you can only insert the item in one direction for cutting. With a spiral blades you can push your item in any direction! That makes it a breeze to cut the curvy and holey pieces that I love to make. For inside cuts you have to drill holes in it so that you have a place to insert the blade. Inserting the blades will take some more practice.
I got this because cutting out my patterns by hand took hours and was very hard on my arthritic elbows. I am in love with this scroll saw and can’t wait to try more things. I just have to get better at putting that blade in for the inside cuts.
Here are what pieces that I got from a 12x12inch piece of 2in thick pink insulation board. I saved the inside holes in order to glue them onto other pieces like that boring one in the lower center. These are now ready for the paper clay process.

Have a Happy day and thank you for reading. Please follow me on social media!

