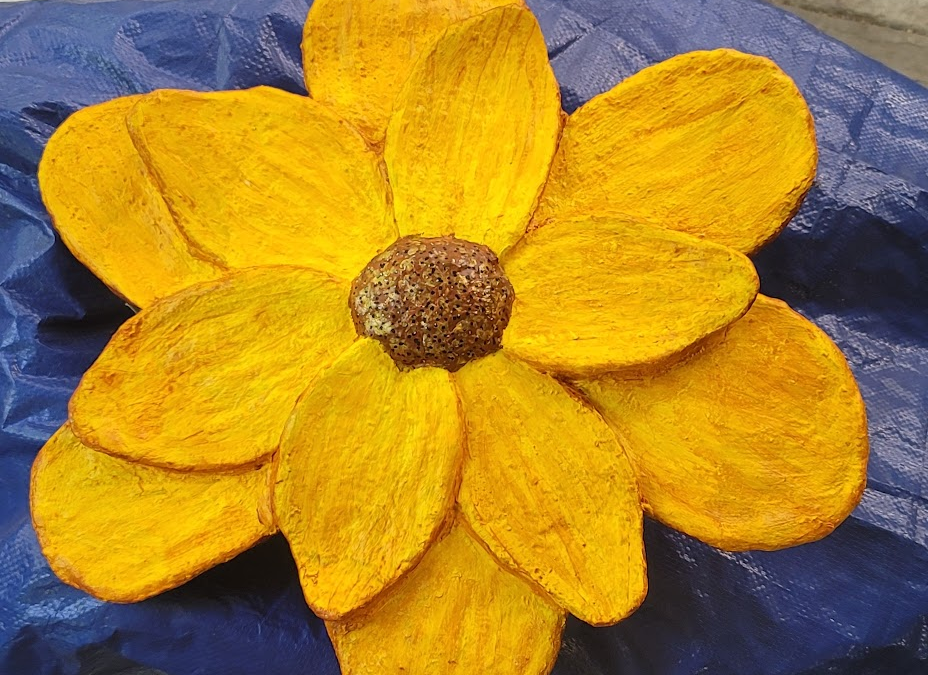
Cement Flower
Cement Flower
I used a cement clay for this flower. Each petal was constructed separately and hopefully with the instructions included here you can create your own. I will be making more of them and hopefully making videos of the process which I will then put on my YouTube channel. Just learning all of that though with help from my daughter over text messaging so that is slow going.
To start I use heavy sculpture wire and bend it into a petal shape with longish ends, about 5 inches. I then harden the wire into my shape by hammering it on a flat anvil. This will stiffen the wire so that it will stay in place. I then used masking tape to go across the petal on each side. I bought plaster cloth rolls and cut it into strips. Lightly dip the strip into water and then lay it over the masking tape. Overlap the strips and making sure that you go around the sides. Go down to the bottom of the petal. With a damp finger rub the strips lightly to spread the plaster into a solid layer.
The petals in the back layer should be a little larger and flatter. The petals for the upper layer will be smaller and can have some bends for more shape.
I made a ring from the wire and hooked the back layer of petals onto it, trimming the ends as needed. Be sure to leave some space to attach the top layer of petals. To hold the back petals in place and add some more structure I used a metal ring that can be found in the floral department of craft stores and attached it to the back of the petals. I also started applying the cement clay to the other petals and to the back layer.
Attach the top petals to the ring and then add cement clay underneath those petals to stick them in place to the lower petals. To hold the petals in place at the ring, I used some epoxy clay first and after that was dried overnight I started using the cement clay on the center to build it up for the center of the flower. When building up the backside with the cement clay create a wire hook and embed it in the cement clay by making a loop and then flay out the ends in opposite directions and cover with clay. Bend out the top loop portion so that it sticks out from the back of the flower in order to have a “hanger” to hook the wall hanging on a heavy duty nail or screw.
This is a time consuming process. You can only work on one side at a time as you must give the cement clay time to harden and cure before flipping it over and working on the other side. That can take up to 24 to 48 hours depending on your conditions.
Here is the completed front side. The different colors of grey is just the colorations the cement clay goes through as it cures. It will also be cold as it cures.
Here is the back side of the completed project but you can see the hanging loop.
When done with all the cement clay then let it sit and cure for at least a week. It needs to be completely dried before the next steps.
Now for the painting. The first layer will be a primer. I used Gesso as that is what I had on hand. I painted 2 layers of it on the front and back. The cement will absorb the paint so doing this will make your actual paint colors more vibrant. Then paint your flower as desired. I actually painted it at first with yellow and purple but I didn’t like what I ended up with so painted over it with gesso and started over. I used yellow, indian yellow and a little _______. Sometimes mixing the colors as needed for the petals. I used ______ for the center and for the back. For low lighting the edges and the undersides of the top layer petals I mixed a tiny bit of the __________ with the indian yellow to make a darker hue.
For the center I also added dots of black and gold paint. Let the paint dry completely. Then seal both sides with a good exterior sealer, 2 layers.
Here is the cement clay recipe that I used. cement clay
Other items that I used:
Paints: Nova Paints I also used their Exterior Varnish as my sealer. It is listed under their mediums tab. These paints are wonderful and it lists on the bottle all the ways it can be used including on masonry. They are wonderfully priced and they ship fast to the continental USA. You will have to check their site for other shipping options. Easy water clean up is a bonus!


